Unified Scanning Profiles for MFPs: TWAIN/WIA Without the Chaos
How to set up unified scanning profiles for MFPs via TWAIN/WIA: formats, DPI, color modes and file names for archives, contracts and forms.
Why unified profiles are needed and what typically goes wrong
When a company has no standard, everyone scans “the way they’re used to.” One person sets 600 dpi and color, another 200 dpi and black-and-white, a third adjusts contrast "by eye." As a result the same document scanned by different employees looks different and varies in size: from 200 KB to 20 MB.
Discrepancies almost always arise because settings are spread across several places: in the TWAIN/WIA driver, in the scanning application, and sometimes on the MFP itself. A user can save "good" parameters only for their workstation, while a colleague uses defaults. Add driver updates, device replacements and Windows versions changes — and familiar values get lost.
Problems usually appear quickly: small text and stamps become unreadable, a "dirty" background or lines appear, files suddenly balloon so they won't be sent by email, and confusion starts over formats, page orientation and file names.
By "identical result" in practice we mean measurable things: text readable at 100% zoom, pages straight and in correct order, stamps distinguishable, file size predictable, and a format suitable for storage and search.
Documents with repeatable flows suffer most: contracts (signatures and stamps), forms and applications (small fields and handwritten text), and archive batches where volume control matters.
Unified scanning profiles solve this with a simple rule: "choose a profile for the task, don’t tweak sliders." The result becomes stable and verifiable.
TWAIN and WIA without the technical details: where settings live
TWAIN and WIA are the "bridge" between an MFP and the program you scan from. They determine which parameters the user sees: color or B/W, 300 or 600 dpi, PDF or JPEG, single- or double-sided.
The problem is usually not that someone "scans poorly." It’s that settings live in different places, and everyone picks their own. Standardization therefore starts with understanding: where exactly do you control parameters?
Profiles and parameters are typically set in three places:
- In the driver or scanner dialog on the PC (TWAIN/WIA in the scan dialog). This is common but depends on the specific PC and user rights.
- In the application (for example, scanning from accounting software, email, or office software). These may have their own presets that partially override the driver.
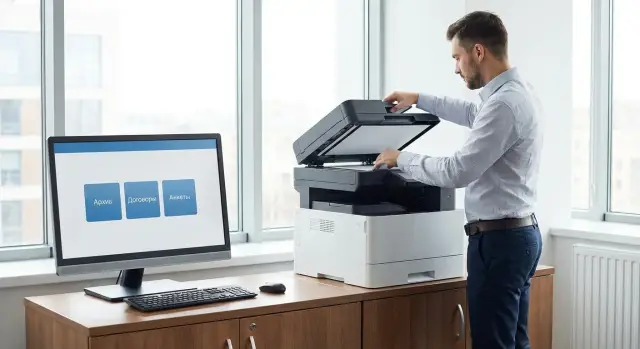
- On the MFP panel (scan to folder, email, or network resource). This is the most convenient for a standard because one profile works the same for everyone who uses the device.
Why do profiles differ even on identical models? Usually due to different driver versions, different checkboxes in applications, firmware differences, and because some scan via TWAIN while others use WIA. Another source is auto-corrections ("enhance text," "remove background," "increase sharpness"). Enabled on one PC and disabled on another, these make scans look like they came from different organizations.
What should you standardize first: settings or process? Start with process. Choose one clear path for most employees (for example, scanning from the MFP panel to the required format and quality), then lock down parameters. If the process is consistent, you’ll get uniform results faster and can then refine TWAIN/WIA details where needed.
Parameters that most affect the result
To make profiles produce consistent outcomes, agree on a few key settings. These are the ones that often make a scan either readable and light or heavy, noisy and useless for search.
Resolution (DPI) sets the balance between quality and file size. For regular text, 300 DPI is usually enough. 200 DPI can lose small fonts and stamps, while 600 DPI dramatically increases file size and load on the network and storage, often without real benefit.
Color affects readability and weight as much as DPI. Use color when ink color, stamps, highlights or photos matter. Grayscale is often the best option for contracts: it keeps midtones without inflating files. Black-and-white suits plain text but can "break" thin lines and stamps.
Format should match the task and retention needs. PDF is convenient for exchange, PDF/A for long-term archive, TIFF is useful for archival chains or when page-by-page files are needed without surprises. JPEG is mainly for photos (it often introduces artifacts on documents).
Compression and "100% quality" can worsen results: files become huge while letter contours still blur from noise. Prefer moderate compression and careful processing.
Flow options matter too: duplex scanning, auto-rotation, cropping and blank page removal. They save time but must be tested on real batches so the device doesn’t remove a page with a signature because it’s almost blank.
Enable OCR when documents must be searchable. Check several things: correct recognition language (Russian/Kazakh/English), that text in the PDF is selectable and searchable, that stamps and signatures don’t turn into "garbage" after OCR, and that skew and blurriness don’t prevent recognition.
A set of corporate profiles: Archive, Contracts, Forms
With unified profiles, users stop guessing which settings to choose. Ideally three clear options cover the most common tasks.
Profile "Archive"
Goal — long-term storage and predictable quality over years. Suitable for orders, acts, primary accounting documents, minutes, and incoming correspondence.
This profile prioritizes preserving text details and small marks even if files are a bit larger. It’s better to spend extra seconds scanning than to re-scan boxes of documents later.
Profile "Contracts"
Goal — easy review and reliable readability of signatures, stamps, dates and details. Suitable for contracts, amendments, specifications, and powers of attorney.
Here the balance matters: text should be sharp and signatures/stamps should not become gray blobs. If the document will be reprinted, careful page geometry is especially important.
Profile "Forms"
Goal — speed and minimal manual handling. Suitable for HR forms, applications, surveys, intake forms where many similar pages are processed.
The main priorities are even margins, consistent orientation and stable results across a batch. "Smart enhancements" that work inconsistently only get in the way here.
For all three profiles set common rules: A4 by default, a single orientation (for example, portrait). Enable auto-crop and auto-level only after a short real-paper check.
To avoid confusion, add a short description in the profile name or tooltip: what the profile is for, 2–3 document examples, what matters most (quality or speed), one tip for "what to do if a sheet is skewed or has a shadow," and where the result is saved.
Recommended settings for each profile (no magic)
Fix base parameters so users choose a profile instead of configuring TWAIN/WIA every time: file format, DPI, color mode, OCR and blank page handling.
Profile "Archive"
For long-term storage and audits.
- Format: PDF/A (if supported), otherwise PDF
- Quality: 300 DPI, grayscale
- Text: OCR enabled, default language — Russian (add Kazakh if needed)
- Processing: blank page removal enabled
Profiles "Contracts" and "Forms"
Readability and predictable file size are key.
For "Contracts" use PDF, 300 DPI and grayscale. Enable color only if the document contains stamps, colored notes or attachments. Keep OCR enabled to allow later text search.
For "Forms" 200–300 DPI is often sufficient. If forms are printed cleanly, black-and-white may work, but be cautious: thin lines and faint signatures can disappear. Enable OCR as needed, for example if forms will be added to search or a database.
Default duplex scanning for contracts. For forms, use simplex if the back sides are known to be blank.
Control file size: avoid "photo quality" (600 DPI and full color) unless necessary. As a guideline, 10 pages at 300 DPI grayscale should be a reasonable size. If a file suddenly becomes much larger, someone likely enabled color or too-high DPI.
How to roll out profiles step by step in a department or company-wide
Implementation works when you agree on one result and make it the easiest option for users. The goal: profiles should produce the same file regardless of office, device model or application.
Start by collecting facts. Walk through departments and note which MFPs are installed, how people scan (via PC using TWAIN/WIA, vendor utility, or from the panel to folder/email), what document types are most common, and what problems annoy users (skewed pages, faint scans, oversized files, unreadable stamps).
Then choose a small set of base profiles (usually 3–5) and fix rules: profile names, file format (PDF or company standard), color mode, resolution, orientation, auto-rotation and blank page removal. Important: one profile — one task, not a catch-all.
Steps for rollout
-
Create a reference PC: configure profiles in the chosen scanning program and test with real papers (stamps, signatures, small text).
-
Record settings: screenshots, a short description of parameters and a control set of test sheets.
-
Deploy to other workstations: same driver versions, same profiles and identical names. Use a print server or centralized driver distribution if available.
-
For staff who scan without a PC, create the same profiles on the MFP panel (scan to folder/email) with the same names.
-
Run acceptance: users from different departments scan the same test pack and compare results against a checklist.
Finish with a one-page guide and a short demo: where to choose a profile, where files are saved, and what to do if scans turn out faint. If rollout covers many devices and sites, a system integrator like GSE.kz can help align drivers, profiles and support so the standard doesn’t drift over time.
File names and storage order: so you can find files later
A unified scanning profile is useless if files are named randomly and stored haphazardly. A clear filename and a predictable storage path save time and reduce errors during audits.
A good filename should include enough data to understand what it is, where it came from and its status. A common logic is: date (YYYY-MM-DD), department or department code, document type (CON, FORM, ACT, INV), counterparty or project (short), document number or internal ID.
Example: 2026-01-19_HR_FORM_Ivanov_ID4573.pdf or, if personal data should be avoided: 2026-01-19_HR_FORM_ID4573.pdf.
Avoid names like "Scan0001.pdf": they are indistinguishable, get overwritten and force manual inspection. This is not pedantry — it protects user time.
Folder structure should be consistent. A clear option:
- 01_Incoming
- 02_In_Process
- 03_Completed
- 04_Archive
Documents should move forward only. That way storage location indicates status even if the file name isn’t perfect.
If a document contains personal data, enforce basic discipline: don’t put full names in filenames unless necessary, restrict folder access by role, and avoid sending scans via instant messengers. When sharing is needed, use an internal ID and a separate folder for sensitive documents.
When scanning in batches, barcode separator sheets help: one sheet between sets lets the MFP or software split the stream into separate PDFs. The key is that the rule must be uniform; otherwise some batches end up in one file and manual fixes start again.
How to check quality and accept profiles for production
Profiles must be accepted as a small internal standard to work. Otherwise, one department will call the "Archive" profile perfect while another complains about "gray" stamps or oversized files.
Test set: what to scan before launch
Collect a short test set and run it through each profile. Use real typical papers (with anonymization), not ideal samples.
- A page with small text (6–8 pt) and a table with thin lines
- A document with a blue stamp and a faint signature
- A multi-page contract with different sheets (text and attachments)
- A form with fill-in fields and handwritten answers
- A couple of pages that often feed skewed: crumpled edges, staples, traces of photocopying
Run the set on at least 2–3 different MFPs and on 2–3 different PCs to catch TWAIN/WIA surprises and optical differences between models.
Acceptance: criteria to consider the profile fit for use
Write criteria in advance to avoid subjective disputes.
- Readability: small text is legible, thin lines remain visible
- Orientation and cropping: pages are not rotated and margins are preserved
- File size: reasonable for email and archive, without unnecessary megabytes
- Searchability: after OCR you can find a few control words
- Stability: the same document yields similar results on different devices
If deviations appear, record specifics rather than "scans are bad": profile, MFP model, PC, and what exactly is wrong (for example, "stamp unreadable in the shadows" or "table breaks into pixels").
Change a profile only if the problem repeats across documents and interferes with the task (archiving, legal validity, data entry). If the issue is profile choice (e.g., "Forms" used for a contract), brief training and a reminder are usually enough.
Common mistakes and traps when configuring TWAIN/WIA
A frequent issue is choosing settings that make the image look "prettier" rather than making the document readable and consistent for everyone. Two people scan the same contract and get different results: one’s stamp is visible while the other’s disappears.
Too-high DPI is a classic trap. 600–1200 DPI rarely helps for ordinary documents but dramatically increases file size, slows emailing and archive uploads, and can break network scanning. For text 300 DPI is usually sufficient; use 400 DPI selectively for fine detail.
Choosing black-and-white (B/W) instead of grayscale is another painful mistake. B/W with a threshold "cuts" midtones: thin signatures, stamps and watermarks may vanish. Grayscale typically gives more reliable results without extra "noise."
Auto-enhancements, sharpening and "background removal" in TWAIN/WIA drivers often spoil business documents. These functions add grain, halos around letters and artifacts on lines. What looks higher contrast on screen often looks worse in print and archive.
Saving multi-page documents as separate JPEGs is another trap. You end up with a set of single images, pages are easy to mix up, and staff spend time reassembling them. For contracts and forms, use one file per document (PDF or multi-page TIFF if required by your system).
"OCR enabled but not searchable" is usually due to two things: wrong recognition language and a poor source (skew, blur, noise). If the scan was made in aggressive B/W or with auto-enhancements, OCR fails more often.
Finally, even with careful settings everything falls apart when profiles live in different places: the MFP panel is set one way, the TWAIN driver another, and the WIA application a third. For a standard pick one "source of truth" and verify three things: DPI, mode (grayscale/color), format and compression match; enhancements are disabled where not needed; and profiles on the device and workstations are aligned.
Quick checklist: admin and user
Profiles work when they’re easy to find, hard to spoil accidentally, and everyone knows which one to pick.
Admin checklist
Before rollout check:
- Profiles are created and named the same on all MFPs and PCs (for example: "01_Archive", "02_Contracts", "03_Forms").
- TWAIN/WIA settings are locked down: users can’t change key parameters (DPI, color, format, auto-rotation), or changes don’t persist.
- It’s clear where settings live (driver on PC, application, MFP panel) and who can change them.
- Folder permissions and network resources are verified: scans save correctly for ordinary users.
- There is a one-page guide: which profile for what and what counts as a rejected scan.
User checklist (pick in 10 seconds)
Rule: choose a profile by purpose.
- "Visible and printable" — choose "Contracts".
- "Long-term archive" — choose "Archive".
- "Quick and many pages, readable is enough" — choose "Forms".
Do a quick visual check before sending: the document feeds straight, fields aren’t cropped, no blank pages, and small text and stamps are readable.
If the file is suspiciously huge or too small and blurred, don’t send — re-scan with the correct profile.
If the result is poor, take three steps before contacting support:
- Re-scan in the same profile, placing the sheet carefully (straight, uncreased, press the lid).
- Check that the correct profile is selected (especially Archive vs Forms).
- If it repeats, try another scanning source (TWAIN or WIA) and compare. Then you’ll be able to tell the admin: profile, MFP, application and an example page.
Real-life example: how profiles help HR
HR typically scans two document types: candidate forms and signed contracts. The archive also needs final files suitable for long-term storage, for example PDF/A.
Before a unified approach, each employee configured scanning differently: 200 DPI here, 400 there, gray backgrounds for some, cropped edges for others, and contract stamps readable sometimes and smudged other times.
After deploying profiles on MFP panels and PC applications, three clear options appeared. In TWAIN/WIA interfaces they have the same names and produce comparable results.
What the employee sees
The employee chooses a profile by task: "Forms", "Contracts" or "Archive (PDF/A)". They load a batch into the feeder and press "Start." The result lands in the default folder: forms into the candidate folder, contracts into the employee folder, archive into the archival transfer folder.
Typical problems disappear: varying skew and cropped edges go away, stamps and signatures are more consistently readable, files stop becoming needlessly large, pages don’t get mixed up, and filenames stop being scan001.pdf.
How a manager sees the standard is working
Once a week a manager randomly opens several files from each folder and checks two things: the profile is indicated in the filename or metadata stamp (if required), and quality is consistent across MFPs. If something “drifts,” it’s visible immediately and settings can be restored without retraining the whole department.
Next steps: lock the standard and keep it alive
Profiles stick only when the process has owners and clear rules. Otherwise someone will change settings “just for one case” and uniform results will vanish after a month.
Assign 1–2 owners: usually a business person (records or HR) who decides what a normal scan is, and an IT person who maintains settings and devices. Both must have authority to say "this is how we do it" and "this is not allowed."
Document profiles as a short standard (1–2 pages): which profiles exist (Archive, Contracts, Forms), which documents belong to each, and which settings cannot be changed without approval (DPI, color mode, format, compression, auto-rotation).
To keep the standard alive, set a simple control cycle: quarterly collect 10–20 recent scans from different departments and check readability, skew and blank pages; review average file sizes and sending times; analyze complaints and root causes (wrong profile, changed settings, different drivers); record changes and who approved them.
If many MFPs and different models exist, plan centralized rollout and support from the start: uniform profiles, uniform names, and uniform restrictions on changing settings. This reduces support load and eliminates "local rules" in each office.
When internal resources are insufficient, engage a system integrator. For example, GSE.kz provides system integration and 24/7 support, helping maintain a unified standard across a large device fleet and distributed network.
FAQ
Why do we need unified scanning profiles if people can just set "what’s convenient"?
A profile ensures the same document scanned by different employees has consistent quality, size and format. That makes scans easier to send, store, OCR and review, and removes most errors caused by "everyone scanning how they prefer."
Why do identical MFPs produce different scans?
Settings are usually spread between the driver (TWAIN/WIA), the scanning application and the MFP panel. As a result two people can scan in the same place but with different DPI, color mode and processing, producing different results.
Where is it better to set standards: TWAIN/WIA on the PC or on the MFP panel?
If possible, make the primary path the MFP panel (scan to folder/email/network) with identical profiles for everyone. Keep TWAIN/WIA on PCs for exceptions where scanning from an application is necessary.
What resolution (DPI) should be the default to avoid complaints about quality and file size?
Start with 300 DPI and grayscale for most office documents. This usually yields readable text and visible stamps without a big file size. Use 600 DPI only for specific needs where fine detail is required.
Which mode to choose: color, grayscale or black-and-white?
For contracts and documents with stamps, grayscale is often best because it preserves tones and doesn’t "cut" signatures. Use color only if it carries meaning (highlighting, color attachments). Use black-and-white cautiously — thin lines and faint signatures may disappear.
Which format is best for corporate scans: PDF, PDF/A, TIFF or JPEG?
Default to PDF, and use PDF/A for long-term storage if your system and MFP support it. Keep JPEG for photos — on text and stamps it often creates artifacts and is inconvenient for multi-page documents.
Which corporate scanning profiles should we create first?
Start with three clear profiles: "Archive", "Contracts", "Forms". The names should clearly indicate the task so employees pick a profile rather than tweaking sliders every time.
When to enable OCR and how to check that it actually works?
Turn on OCR when scanned documents need to be searchable, and set the correct recognition language. After setup verify on real scans that text in PDFs can be selected and searched — otherwise the OCR may be "on" but useless.
Why do files suddenly become huge even though the document is only a few pages?
Files become huge most often because of too-high DPI, color enabled unnecessarily, or "enhancements" like background removal and extra sharpening. Try a 300 DPI grayscale profile without aggressive auto-corrections and compare size and readability on the same page.
How to quickly roll out profiles company-wide without drowning in settings?
Create one reference test set and run it on different MFPs and PCs to catch TWAIN/WIA and firmware differences. If many devices need centralized alignment of drivers, profiles and support, involve a system integrator — for example, GSE.kz can help organize the standard and provide ongoing support.